How to Lurk with Purpose: A Guide to Street Window Portraits
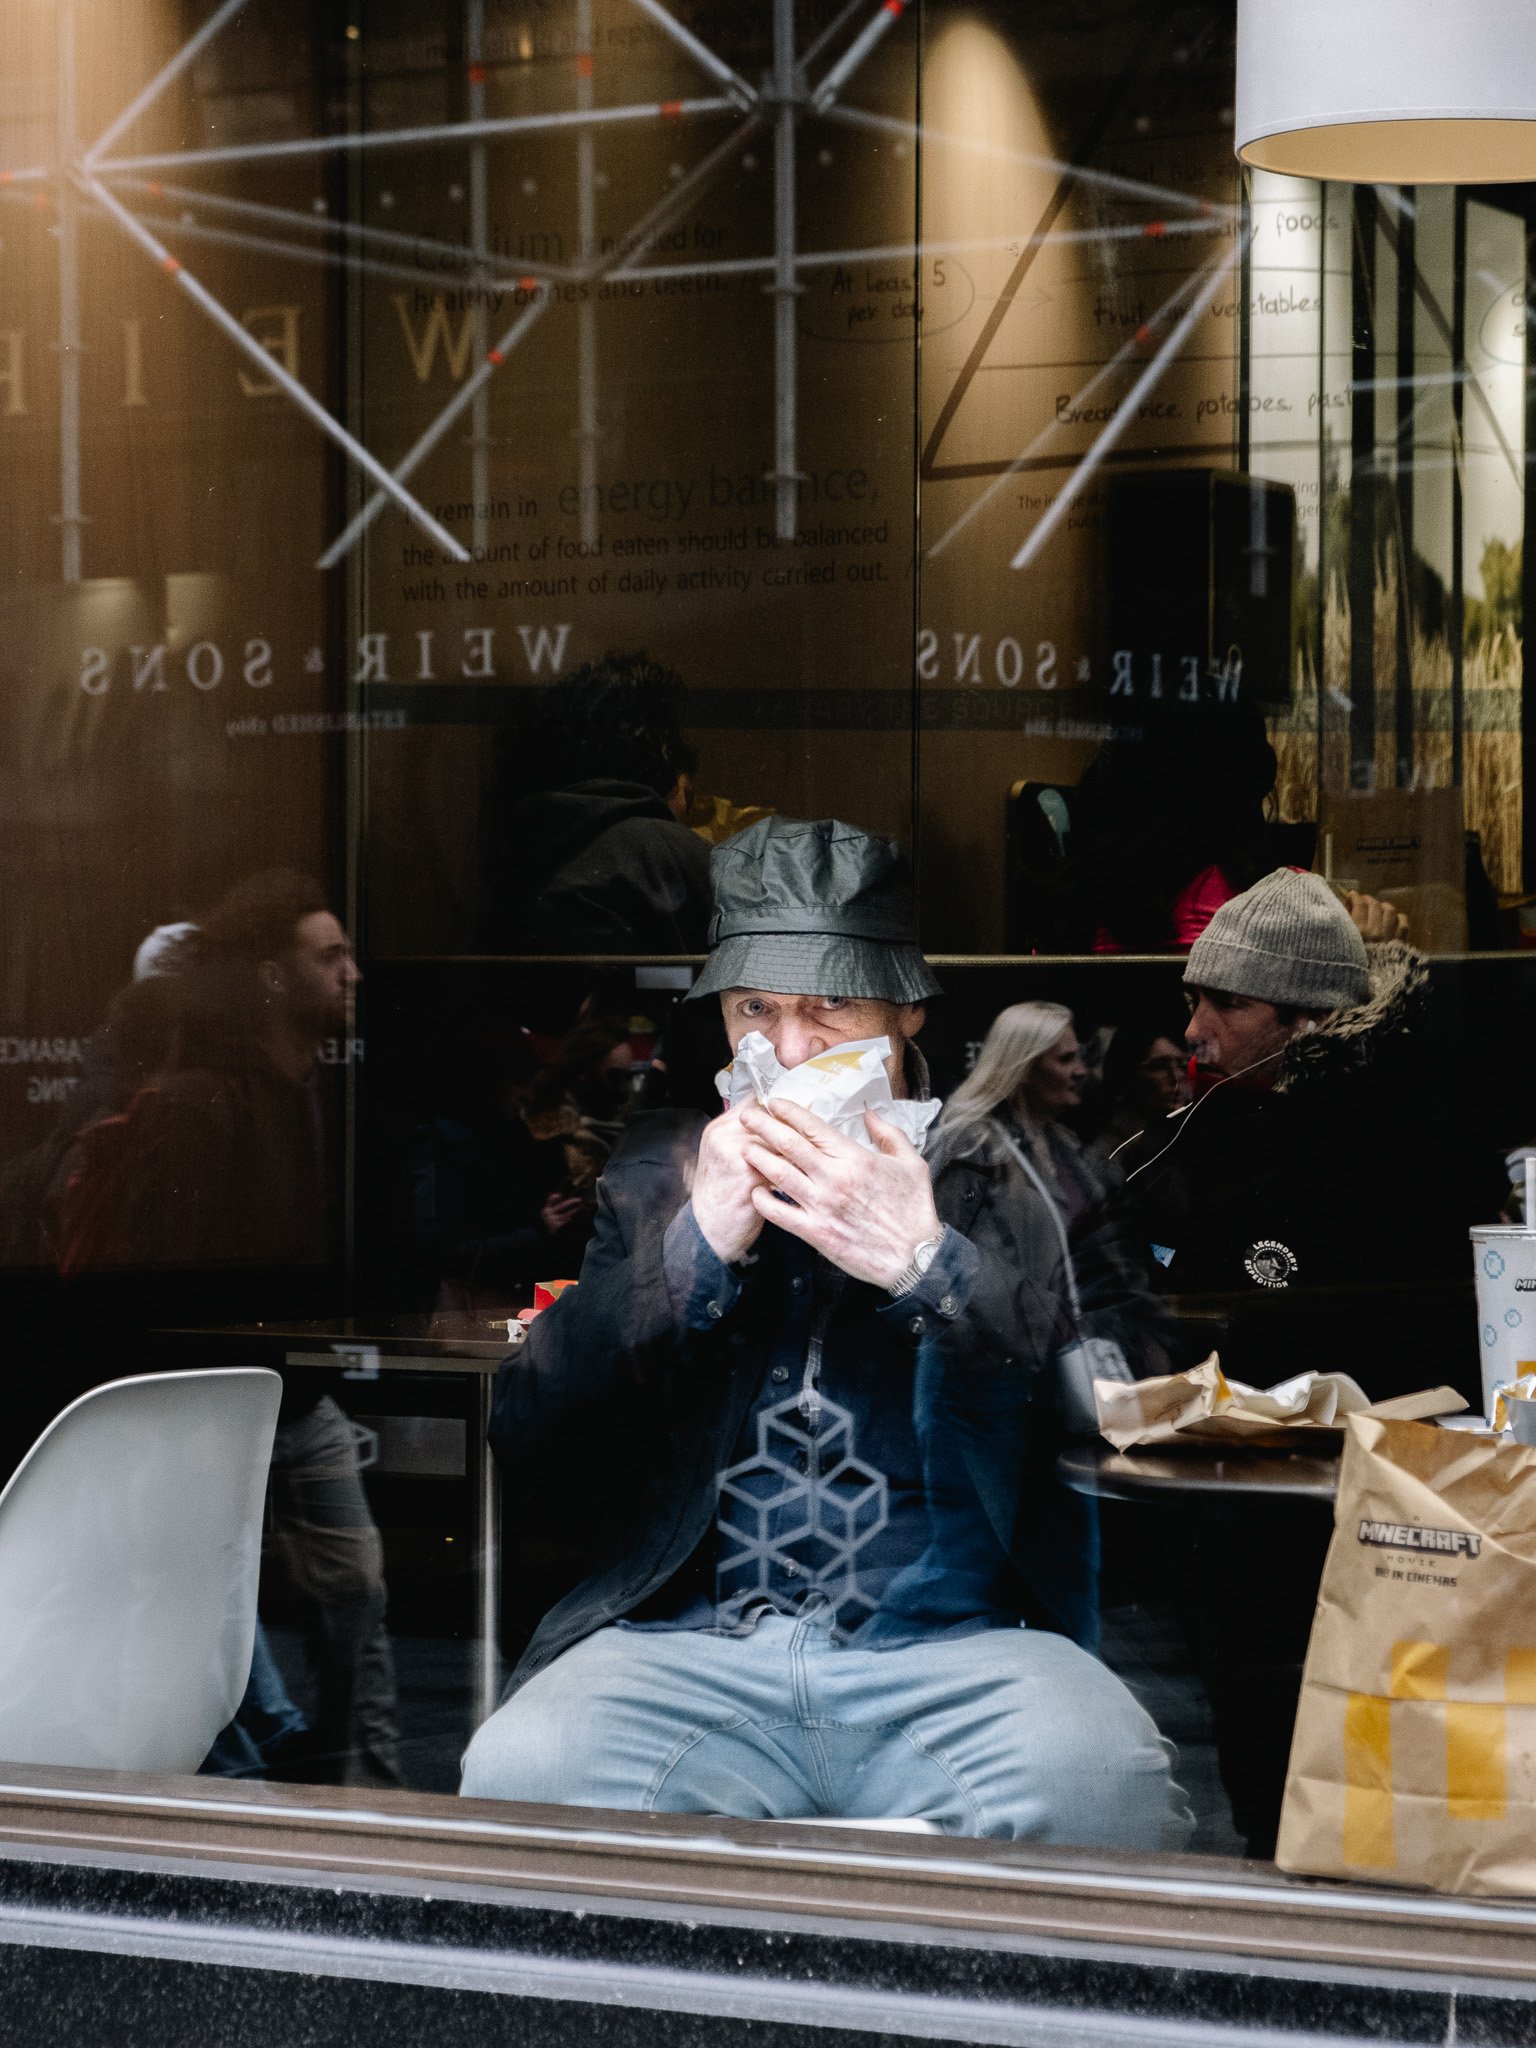
A photo I captured earlier this year copyright shootstreetrepeat.com
A Window into a Stranger’s World
I remember the first time I started seeing window portraits on Instagram. Their popularity seems to have grown year after year. In “classic” street photography, they never seemed quite as prevalent as they are today. I can only speculate as to why—but what remains true then and now is that there’s just something visually satisfying about a window shot. A small slice of life. A literal window into a stranger’s world.
They don’t need much context. They're just portraits—sometimes candid, sometimes not (if the person sees you). I'm not here to debate whether that still counts as “real street photography.” That's a discussion for elsewhere. What matters is that they look cool, people like looking at them, and people like shooting them.
I have a love–hate relationship with window portraits, but I’ve done enough over the years to pick up a few tips—technical, social, compositional, and even some more advanced ways to stand out. If you’re curious about how to level up your own window portrait game—whether as a learner, a weekend warrior, or someone looking to specialise—read on.
📸 First, some examples of my own photography below.. Copyright shootstreetrepeat.com


What Counts as a Window Portrait?
All of the examples above are what I’m talking about and can be shot by a practiced beginner/intermediate. As mentioned earlier, the subject may or may not be looking at the camera. If they are, it doesn’t matter it’s not candid per se—sometimes they just spot you. (And I think that sometimes eye contact can elevate the shot.)
Gear & Technique Basics
I think window portraits are best shot with lenses of 50mm or longer. Anything wider and you’ll struggle to go unnoticed—if your goal is candidness—and you’re more likely to get distortion when shooting against a flat surface like glass.
When shooting front-on, imagine your sensor being perfectly perpendicular to the window to avoid skewed geometry you’ll need to fix in Lightroom. Imagine your cameras sensor and the window are two pieces of bread—they should fit together, a photography sandwich. If shooting at an angle, your camera’s level gauge can be a big help. Use any tool at your disposal to nail alignment.
Other basics:
Good autofocus is essential.
Mirrorless cameras are helpful for previewing exposure, adjustments to exposure can be made much easier than a DSLR—if you’re quick anyway!
Don’t worry—we’re not getting into the ethics of window portraits here. That’s a rabbit hole you can explore on Reddit or in YouTube comments. Plenty of hand wringing there if you have the time to explore!
Finding the Right Locations
If you’re shooting in your home city, you can scout for windows ahead of time—places where everything could come together: good composition, frequent foot traffic, and above all… good light.
Coffee shops, bus stops, cars, offices—anywhere with visible glass and human life. You can scout without your camera, just focus on looking. No pressure to get a shot, just train your eye.
What to look for:
Light: It doesn’t have to be direct, but it needs to be there. A key sign? If the space inside is darker than outside, your camera might expose for the exterior, leaving your subject underexposed. You can work around it with manual settings, spot metering, or exposure compensation—but it’s not ideal. Besides which, your subject is going to pop more if they have even diffused light on them. From the examples above, there are two photos where the interior doesn’t have good light, can you spot them?
Time of Day: Some windows look great all day. Others only work with specific lighting—early morning, golden hour, or even after dark. Do your homework if you can.
Bonus Tip for Beginners
A great exercise is to frame up shots of your chosen windows without anyone inside. That way, when the right person does show up, you won’t be scrambling to figure out composition. You’ll have only a second or two to get the shot—if you miss, it’s gone, and you’re probably not making a new friend either.
And a word of advice: don’t assume the glass makes you invisible or the door isn’t reachable pretty quickly by someone sufficiently motivated! We’ll get to that later.
The Pre-Shot Setup
You’ve found your window. You’ve scoped it out. Maybe you’ve even walked past it to see if it’s worth stopping for.
If there’s a moment you don’t want to miss, go for it. But if you’re after a clean portrait with good framing, preparation is key.
Set Your Focus Point Ahead of Time
This is a game-changing tip I picked up from my friend Nuno (more on him later). Preset your focus point so you’ve already decided where the subject’s head will be in the frame. Especially useful if you’re shooting wide open or using a slower lens.
In practice, it means:
You walk up.
You quickly line up the window with your cameras screen or EVF.
Your focus point is already in place.
Click.
The less you have to think about in the moment, the better.

Pre- and Post-Shot Social Tips
A big part of street photography is the ability to blend in and avoid fuss. Window shots are risky. You’re close. Your subject is (almost literally) framed. And glass or not, some people don’t love being photographed.
Here's what you need to know:
People who sit near windows often look out of them. They will see you. So approach with care—don’t stare in until you’re ready to shoot.
Be discreet: Walk past. Circle back. Position yourself calmly and quickly.
If you get caught? Smile. Give a small wave. Don’t try and sneak your way out of it. Sometimes, people are flattered. Sometimes they’re confused. Either way, don’t act shady and don’t linger.
You’re not owed the shot. Don’t be a dick.
Advanced Tips
Of course, what you’re going to discover after a little practice—and if you have some confidence—is that window shots are pretty easy to do. The subject isn’t moving, there’s a barrier between you and them, and they have an intangible quality that makes them generally aesthetically pleasing to look at. This is why Instagram is full of them. So, once you are technically able and confident enough, you should take things to the next level and differentiate yourself from other photographers. There’s no reason why, with a trained eye and a bit of guile, your window photos can’t be head and shoulders above most Instagram street photographers.
Introducing the work of Nunomag
I’ve been shooting for years with Nuno, and I don’t think there’s ever been a time we’ve gone out with the cameras where I haven’t learned something—often a lot. Some people just have instincts for this, and he seems to be one of them. As a fantastic all-round photographer, you’d expect nothing less from him when it comes to window shots.
It’s less about technique with Nuno—or mastery of the camera he chooses to use; those are a given. It’s his attitude of perfectionism and his artist’s eye that enable him to nail window shots, and that same dedication and focus runs throughout all of his work. I’d recommend giving him a follow on Instagram:
Unlike some other photographers you might see on the ‘gram, Nuno works in Liverpool and Manchester. While both are great cities, they’re not considered legendary street photography locations like Paris or New York. Nuno is a great example of a photographer who can make the most of any area he shoots in.
Some photographers refuse to shoot in their home city, only taking their camera out in far-flung destinations. My advice? Make the most of what you’re given—then, when you do get to the fancy destinations, you’ll have an advantage over all the photographers who’ve been coasting on the exotic for too long.
📸 Some examples of Nuno’s work below. Copyright Nuno Mag’


I think the quality of the photos here speak for themselves but on display here are a few things that Nuno has used in these example to elevate his own window portraits.
Use of reflections in the glass; always be looking at the glass to see if a reflection can be used as an additional element, conversely watch the reflections carefully to ensure a reflection doesn’t take away from your photo e.g. lights from cars, people wearing bright colours, too many pedestrians crowding the frame.
Light and shadow in any photo can enhance it particularly as shown in the second frame above to subframe an already interesting subject.
Juxtapositions; many coffee shops have art or posters that when combined with the right subject can make a great photo
Pick interesting subjects! This sounds simple but in order to do this one has to shoot regularly and never hesitate when the right subject is there in front of you.
If you see potential, wait for the moment—like in the example above, where the man’s red napkin mirrors the bow in the woman’s hair in the painting. That kind of timing is no accident. Whether spotted instantly, waited for, or picked later from a “contact sheet,” you make your own luck. Your job is to stay incognito while waiting—something only experience can teach. But just being aware of it? That’s half the battle.
Final Thoughts
I hope this guide gives you a few ideas—or at least encouragement—to give window portraits a proper go. It’s not rocket science, but it does take practice, a bit of technical know-how, and a trained eye.
Learn to see the light. Learn to see the frame. Then move fast and make the shot.
Happy shooting!